Table of contents
Once upon a time, the only way to produce music was to go through one of the record companies that kept a stranglehold on the industry. The equipment for music production was outrageously expensive, so the labels that owned the gear held all the leverage and could dictate terms to the musicians and producers they worked with. But in the 1970s and 80s, something happened that all started to change.
New, inexpensive forms of recording technology made it possible to set up studios in basements and garages. Independent labels spang up worldwide, leading to a renaissance in an industry that had grown stagnant under the leadership of the big record companies.
That revolution continues to this day.
The "bedroom pop" phenomenon of the late 2010s became one of the most influential movements in recent memory. These young artists were working out of their parent's homes or college dorms, yet set the course that pop music would follow for the next several years. And all they needed was some basic studio equipment.
If you want to join the wave of independent producers changing the musical landscape, here's the essential gear you'll need and some tips on buying the right equipment.
The Importance of Quality Equipment for Music Production
A professional-level studio can cost anywhere from $30,000 to several million to build. If you're only starting, you probably won't find that kind of capital wedged between your couch cushions. That said, you nevertheless want to opt for the highest-level equipment that you possibly can.
The quality of your equipment will have a direct impact on the overall production value of your music. This is important because production value can have a powerful effect on your music's reach, either in a positive way or a negative one.
Consider that, by Spotify's estimation; there are over 200,000 professional or professional-aspiring creators on their platform. That's the level of competition that you're facing. And when listeners have that many options at their fingertips, they're unlikely to tolerate subpar production value from an unknown artist.
Hence why you should strive for the best setup that you can manage, it will give you greater control over your sound and allow you to achieve the best possible results.
Investing in higher-end gear can also save you money in the long run.
They say, "You get what you pay for," and that's very much the case here. So while cheaper alternatives might be enticing, they often lack the durability, longevity, and quality of life features of more expensive gear.
A Studio Set-Up for Every Budget
While it's always good to shop for the best gear that you can buy, you shouldn't feel discouraged if you only afford a modest setup. The most important thing is that you get hands-on time as a producer so that you can refine your skills. Depending on your situation, a simple bedroom setup might be the best way for you to learn the basics of songwriting and production.
So to help guide you at every stage of your journey, we've assembled a few basic setups that should meet the needs of any aspiring producer.
Level 1: The Bedroom Studio
This is where a lot of young talents start their journey, particularly these days.
Megastars like Billie Eilish and Lil Nas X cut early drafts of some of their hits in bedrooms, basements, or whatever available space they could find. So don't worry if this is all you can manage right now. And because the upfront investment is so low, a cunning producer working at this level can put out some very profitable material.
This stage is all about the essentials. It covers the bare minimum you need to get started. Higher levels will integrate more equipment, but they'll always have something analogous to these basic tools.
There are two basic components to this level: a computer workstation and the actual recording equipment.
🖥️ Computer Workstation
The first things that you need are a computer, software, and an interface to connect all of your equipment.
The computer will be the heart of your studio. It will run your digital audio workstation (DAW), handling the processing power required for music production.
At this level, most off-the-shelf models should do the trick. But as you level up, you may need to upgrade to a more powerful rig.
Next is the digital audio workstation (DAW) mentioned above. The DAW is the software you use to record, edit, and mix your music. Popular options include Ableton Live, Logic Pro, and FL Studio.
You may have to experiment to find a DAW that suits your work style. For a novice producer, learning how to remix existing songs can be a great way to cut your teeth and find the right DAW for your needs.
Lastly, you will need an audio interface to connect your microphones, instruments, and studio monitors to your computer. This device converts analog audio signals into digital data that can be processed by your DAW. Look for an interface with high-quality preamps and sufficient inputs and outputs for your needs.
🎧 Microphones, Headphones, and Gear
If you splurge on anything at this level, you should invest in a good microphone. Without one, you can't hope to capture high-quality recordings. There are serviceable options available at almost any budget, but a top-shelf mic can serve you for years to come.
Be sure to get a good stand when you buy you're mic, too. These are essential for positioning your microphones during recording, ensuring that your most valuable piece of equipment doesn't get knocked over and damaged. Look for stands that are adjustable and have a stable base.
Get a pop filter for your microphone. These help reduce plosive sounds (e.g., "p" and "b" sounds) when recording vocals. It goes in front of the microphone to prevent unwanted bursts of air from distorting the sound.
A pair of studio headphones is crucial for accurate monitoring and mixing. The last thing you want is to put out a mix that you think sounds great, only to find out later that a cheap pair of headphones was obscuring a lot of obvious defects in the mix. Look for headphones with a neutral frequency response and good isolation.
You'll need a set of studio monitors, as well. These are specialized speakers designed for accurate playback of recorded audio. They provide a flat frequency response, allowing you to hear your music as it truly sounds.
And of course, you'll the right need the right cables to connect all of this equipment to your computer. XLR cables are commonly used for microphones, while TRS or TS cables are used for connecting instruments and studio monitors.
Setting up a bedroom studio allows you to start honing your skills and experimenting with music production. While this setup may be basic, it provides a solid foundation for your journey as a music producer.
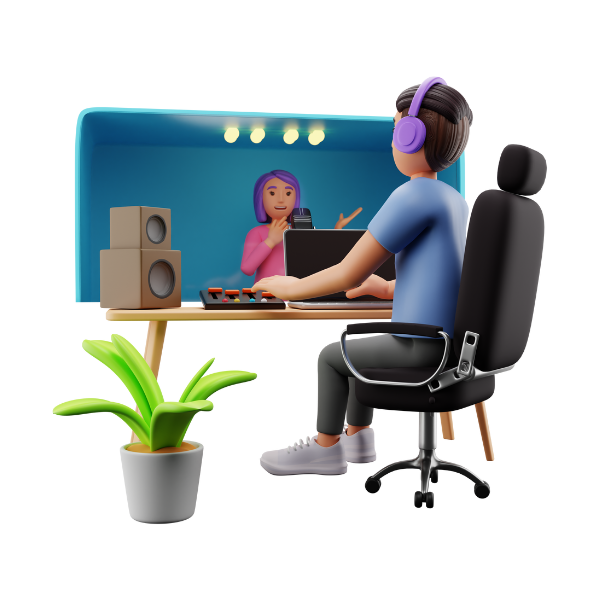
Level 2: The Dedicated Home Studio
As you progress as a producer, you'll outgrow the bedroom setup. When that happens, it's time to create a dedicated home studio.
This entails making simple upgrades to your setup to make your studio more effective and comfortable to work in.
🛟 Quality of Life Improvements
Having a dedicated desk or workstation for your studio is an easy upgrade to make. Look for a desk with enough surface area to accommodate your computer, audio interface, monitors, and other peripherals.
Investing in an ergonomic studio chair is any other simple upgrade. If you're going to spend hours in the studio poring over mixes, you may as do it in comfort. Look for a chair with adjustable height, lumbar support, and adequate cushioning.
You might also want to invest in studio monitor stands. Stands can elevate your studio monitors to your precise ear level, providing an optimal listening position. Look for stands that are sturdy and adjustable to accommodate different monitor sizes.
👂 Acoustic Treatments
As far as improvements to improve the quality of your recordings, acoustic treatment for your studio is a must.
Diffusers are one type of acoustic treatment. They scatter sound reflections, creating a balanced and natural acoustic environment. They are especially useful for larger rooms and can be placed on walls or ceilings.
Reflection filters are another example. These are portable acoustic panels that surround your microphone, reducing unwanted room reflections and improving the clarity of your recordings.
Monitor isolation pads are placed under your studio monitors to decouple them from the surface they're resting on. This helps reduce vibrations and improves the accuracy of your monitoring.
Creating a dedicated home studio allows you to optimize your space for better sound quality and workflow. With proper acoustic treatment and ergonomic furniture, you'll be able to create professional-grade music right from your own home.
Level 3: The Semi-Pro Studio
As you gain more experience, you may find yourself taking on more complex projects. You may need to work with several musicians at once. That means it's time to upgrade to a semi-pro studio setup.
Some of these upgrades will be major pieces of new equipment. Others are smaller additions that can expand your recording capabilities.
👾 New Studio, New Tech
For starters, you should upgrade to a multi-channel audio interface. This will let you record multiple instruments simultaneously.
Along the same lines, working with multiple musicians means you'll need more microphones. Try to collect a variety of options for different instruments and vocal styles.
A MIDI controller should be another tool you add to your studio. These devices let you program and play virtual instruments in your DAW. Look for a controller with a range of keys, pads, and knobs to suit your musical style and preferences.
Adding a studio subwoofer to your setup allows you to accurately monitor low-frequency content in your mix. Look for a subwoofer that complements your studio monitors and provides a balanced and accurate representation of the low end.
😚 Adding the Bells and Whistles
Patchbays are an excellent addition. These are used to route audio signals between different pieces of equipment. They provide a convenient and organized way to connect and reconfigure your studio setup.
Consider adding outboard gear such as compressors, equalizers, and effects processors to enhance your recordings and mix. These analog devices can add warmth, character, and creative possibilities to your sound.
Lastly, a studio rack provides a neat and organized way to store and access your outboard gear and other equipment. Look for a rack that can accommodate your gear and allows for proper ventilation.
Upgrading to this level gives you more flexibility in your production. The ability to record several performers at once is a huge step forward. And access to a wider range of sounds and effects can take your productions to the next level.
Level 4: The Pro Studio
At this stage, you've reached the pinnacle of music production setups. Whether you're running a commercial facility or a high-end home studio, this level is all about efficiency, precision, and top-of-the-line gear.
In an ideal scenario, you will be able to build your studio from the ground up. But as far as improving an existing setup goes, here are the essentials.
🎛️ Upgrade to Top-Shelf Gear
You'll need to invest in a high-end audio interface with top-notch converters, preamps, and clocking capabilities. Look for interfaces that offer low latency, high-resolution audio, and extensive connectivity options.
Your microphone collection should include premium options for capturing the most detailed and nuanced recordings. Consider investing in vintage microphones or high-end condensers for maximum versatility and quality.
Analog mixing consoles can provide a tactile and precise way to mix your music. Find a console that suits your workflow and provides the necessary routing, automation, and processing capabilities.
You should upgrade to high-end studio monitors that offer premium accuracy, detail, and frequency response. Look for monitors that deliver a flat and transparent sound, allowing you to make critical mix decisions with confidence.
Along with your monitors, you should upgrade your subwoofer, as well. You want units that integrate seamlessly with your studio monitors and provide tight and controlled bass reproduction.
🛠️ New Studio, New Tools
Expand your collection of outboard gear to include high-end compressors, equalizers, reverbs, and other processors. Opt for gear from renowned manufacturers known for their exceptional sound quality and craftsmanship.
At this level, clients will expect professional acoustic design and isolation. Consult with acoustic experts to optimize your room's acoustics and ensure accurate monitoring and recording.
If you're running a commercial studio, consider investing in mastering equipment such as dedicated mastering EQs, compressors, and limiters. This allows you to provide comprehensive mastering services to your clients.
Building a professional studio is a significant investment. You need top-of-the-line gear and often even custom-built facilities. But you'll have access to the best tools for creating world-class music productions.
Start Your Career as a Music Producer
As we touched on, you'll naturally want to upgrade your gear over time. But once you assemble the basic equipment for music production, you're ready for the real fun to begin.
Of course, stepping into the studio for the first time can be daunting, even if the studio is in your own home.
It'll take some time for you to find you to get the hang of producing music. But we're here to help. To up your game, check out our music production courses today.